Follow theses steps to install and configure Artist Image Generator on your website without any difficulties. In this tutorial, i will start with a brand new WordPress website so you can reproduce the config easily.
1. Install Artist Image Generator
On the Plugins page, click on “Add New Plugin” then search for Artist Image Generator :

Click on “Install Now” and “Activate”.
Now, on the “Media” tab, you got a new tab called “Artist Image Generator”. Click on it and go to “Settings” :
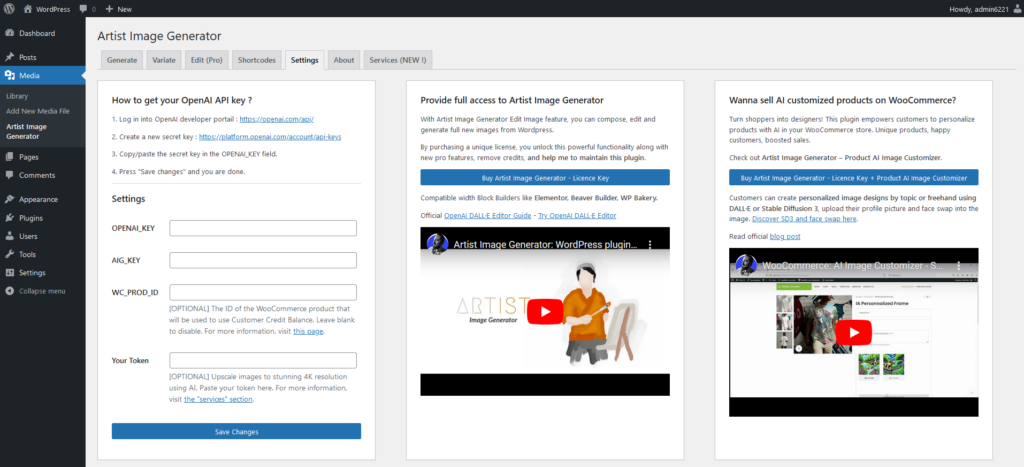
The first thing to do is to fill OPENAI_KEY field by signing up on OpenAI and create a new Secret Key.
2. Create the new OpenAI Secret Key
Signup to OpenAI with your own information and valid your account. Login then click on the top right cog icon called “Settings”. You will be redirected to Your Profile page.

In the left menu, click on API keys then Create new Secret Key :
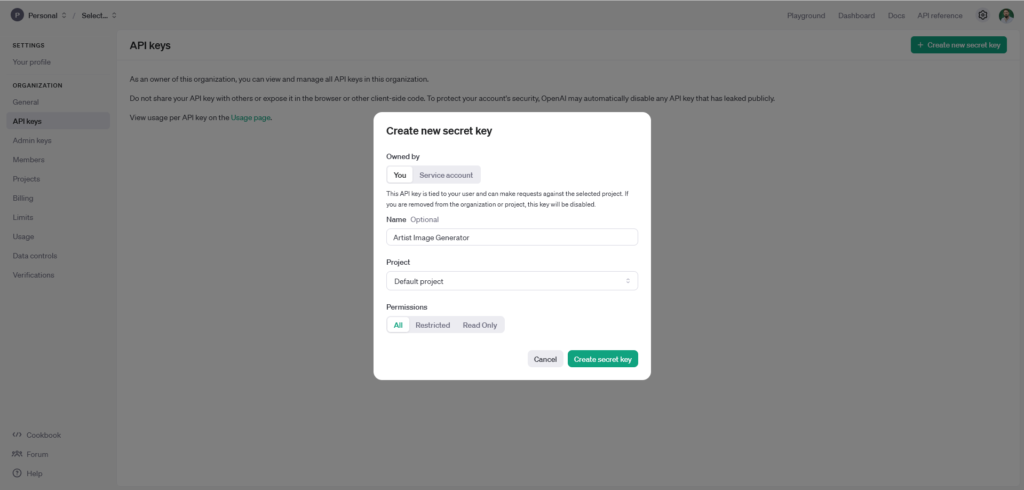
Fill the name of your choice and select “Default project”. For permissions, let as “All”. Click on “Create secret key”. You have now your key beggining with “sk-…”.
Make sure before closing the popup to copy/paste the key inside the AIG’s Settings page, into the field called “OPENAI_KEY” (and then press Save Changes).
Get back to OpenAi and close the popup. Then, you should have something like that :
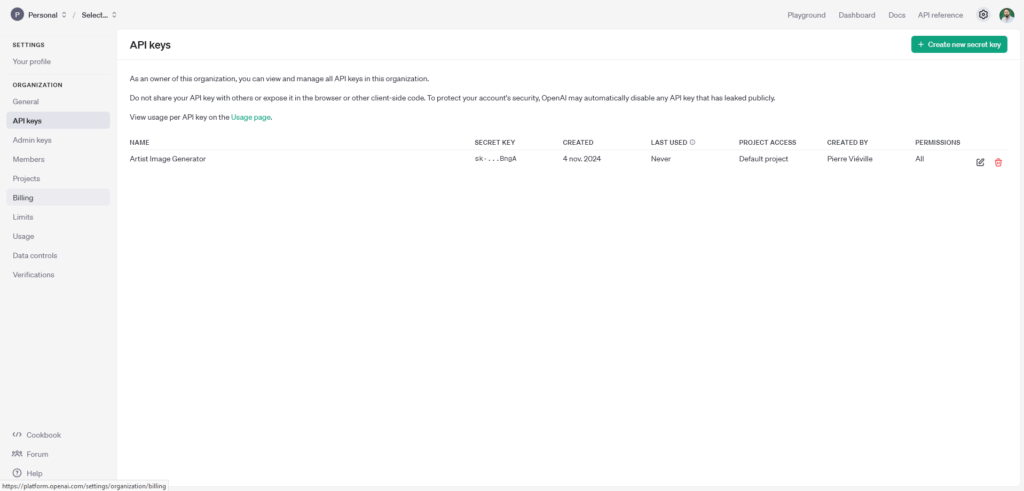
You need to add credits to your OpenAI Account in order to use DALL-E. To do such a thing, click on “Billing” and then “Add to credit balance”. The minimum required amount is $10.
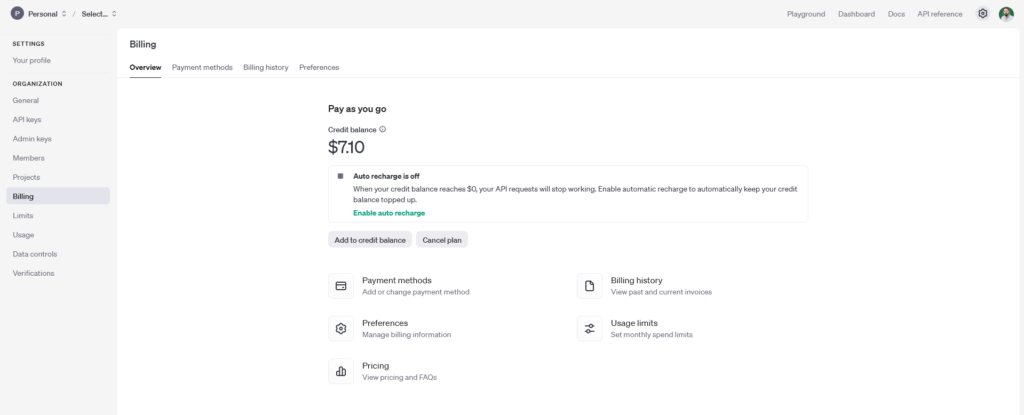
Note: feel free to add payment methods or set auto recharge “on” to make sure you have a positive balance at any moment.
3. Use the basic Artist Image Generator features
Now you should be able to use the basic features of Artist Image Generator inside all your WordPress :
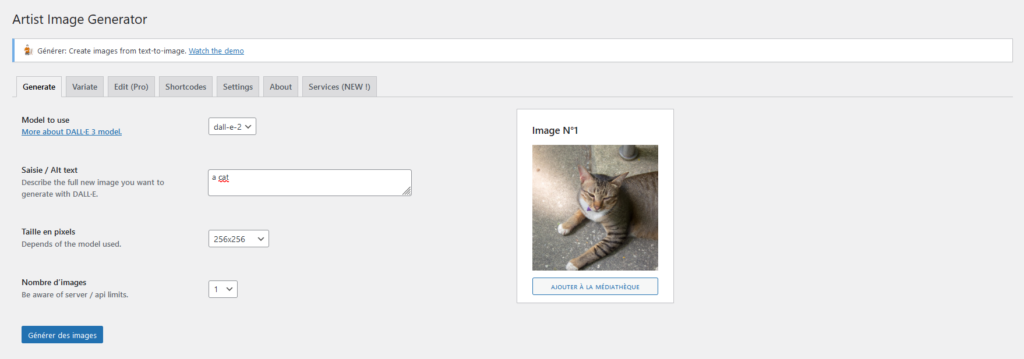
A. Administration – WP Media Library
The plugin will be available inside each areas where an image can be added through the WP Media Library, even if you are using Elementor, Gutenberg, WP Backery and so on.
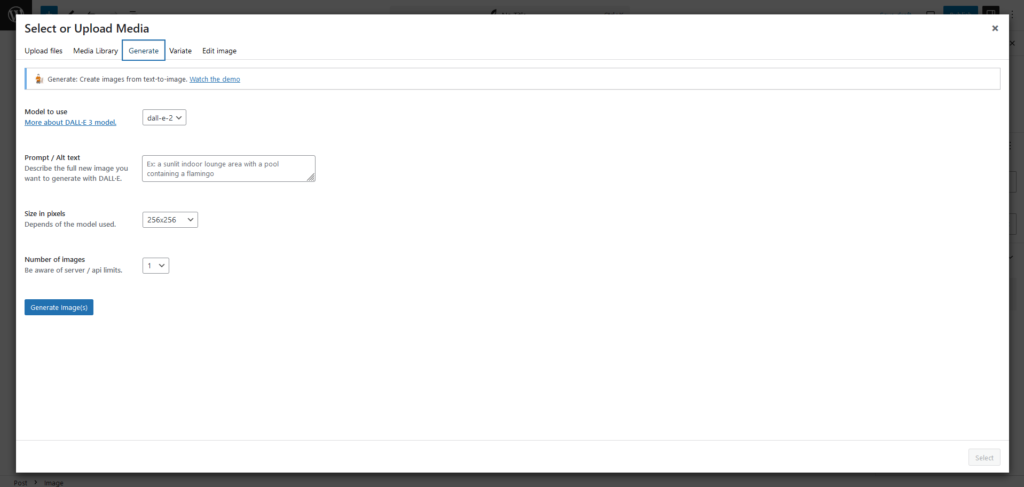
With the free base version of the plugin, you can text-to-image using DALLE-2/3 and make variations of existing images (DALLE-2 only). For DALLE-3 text-to-image feature, only 1 image can be created at time, but you can improve this up to 10 (we’ll see this next).
Note that you got all parameters available from OpenAI like size, quality, etc.
Use case : illustrate your posts, create thumbnails and unique images inside your website.
B. Public – Images Generators
The next base feature is to create Public Image Generators. Generators are shortcodes you build to allow visitors creating images and download them in a page of your website. Basically :
This is one of the main feature of the plugin. You can have many options such as limit the user, add topics, guide the user result by templating the prompt.
[aig prompt="A {topics} tattoo on a white background, in color, representing {public_prompt}." topics="Japanese, Realism, Ornamental, Manga, Landscape" download="manual" model="dall-e-2" size="256x256" n="3" user_limit="3" user_limit_duration="3600" uniqid="tatoo_form_849"]This previous shortcode configuration show a generator. All images are “colored tattoos on a white background“. The subject is prompted by the user (its choice) and the user select some style through topics. The current shortcode use DALLE-2 and create 256×256 images. Each click on “Generate/Retry” generate 3 images, the user is limited to 3 generated images maximum each 3600 seconds :
About the prompt attribute :
The idea behind this attribute is that you build your own and place {topics} and {public_prompt} in any position you need. That’s like a fill-in-the-gaps exercise, you are totally free:
- You can chose to let the user being free : prompt=”{public_prompt}”
- You can chose to guide the user in a particular subject : prompt=”an orc with {public_prompt}{topics}”
- etc…
Feel free to use a detailed prompts and run tests in order to have the results you want.
A concrete tutorial is How to build a Tatoo Image Generator for a tatoo shop. Plus, full documentation and exemples can be found inside the AIG’s “Shortcode” tab of your WP Administration here :
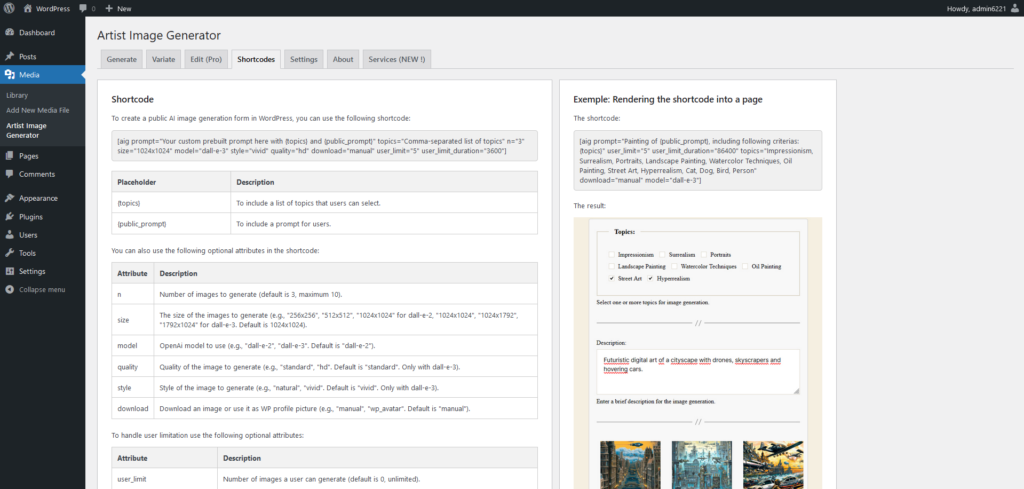
Use case : ideas generators, art generators
4. Use the advanced Artist Image Generator features
With this current install, you can already manage generators and create images for your posts which are very handy to illustrate whatever you want.
Now, there are few more interesting features you can use. It is the complex part. To undestand well, let’s split my customers into 2 categories :
Bloggers : people who wants to use Artist Image Generator to illustrate their blog.
Merchants : people who wants to use Artist Image Generator to sell personnalized product online.
And on my website, i got products which can be used as standalone solution depending of your category :
The WC Product AI Image Customizer : a premium AIG plugin dedicated to merchants to sell personnalized items inside WooCommerce.
–> It contains a Licence Key, all the code and the process to manage image customization inside WooCommerce + a dynamic Product Preview with the user customization + the possibility to have a “credit management” product to sell generative credits to your customers (an alternative to user_limit inside the shortcode).
The Licence Key : this is a basic premium version of AIG with advanced image features.
–> It contains a key to unlock edit feature from the WP admin and allows you to generate more than 1 images per request with DALLE 3.
The Credits Pack : this is an external service of AIG you can use to request optional services API (here you don’t use DALLE but custom services like upscaling). It works as pay to go.
–> It contains credits and it works like OpenAI : with credits, you can use several services like Image Upscaling, Image Generation using Stable Diffusion 3 instead of DALLE, Create’N Face Swap without entering other AIs API Keys : you buy credits on Artist Image Generator website.
-> So when you request one of these service, you will use an amount of credits depending of the services you selected.
Let’s have a look of the right solution you may need to develop your website :
| Product | Bloggers | Merchants |
| WC Product AI Image Customizer | not required | required |
| Licence Key | optional | required |
| Credits Pack | optional | optional |
| Feature | Bloggers | Merchants |
| Image editing with DALLE 2 | Buy a licence key | Buy WC AI Image Customizer |
| > 1 images with DALLE 3 | Buy a licence key | Buy WC AI Image Customizer |
| Sell personnalized products | – | Buy WC AI Image Customizer |
| Upscale all your images via AI | Buy credits | Buy credits |
| Use Stable Diffusion AI (inside images generators only) | Buy credits | Buy credits |
| Use Create’N’Face Swap (inside images generators only) | Buy credits | Buy credits |
You are a blogger and use AIG to only illustrate blog posts
There is nothing more to do. Just use the free AIG plugin version or buy a Licence key to generate more that 1 image at time using DALLE-3. You may also need the Upsaling service to enlarge all your WP images or use Stable Diffusion 3. Then, buy some credits and you are ready to go.
To use Stable Diffusion 3 via my service, please go to the E. section of this post.
You are a blogger and use AIG to illustrate blog posts and have public image generators on some of your website pages
You can use all the features as previous point plus Stable Diffusion AI and Create’N’Face Swap if you need to build specific images generators or try Stable Diffusion instead of DALL-E 3.
The full documentation to build such image generators are available inside your AIG’s “Shortcodes” tab :

You are a merchant and use AIG to illustrate your blog or sell personnalized products
You have to purchase WC Product AI Image Customizer and install the plugin in parallel of Artist Image Generator and WooCommerce plugins.
WC Product AI Image Customizer
Turn shoppers into designers! This plugin empowers customers to personalize products with AI in your WooCommerce store. Unique products, happy customers, boosted sales. Current version: v1.0.7.5 (2024-12-22). Live exemple UrFram
A. WC Product AI Image Customizer installation
After your purchase, go to Plugins > Add New Plugin > Upload Plugin and drop the latest version or WC Product AI Image Customizer.

Click “Install Now“, and “Activate plugin“. You should have something like this at the end :
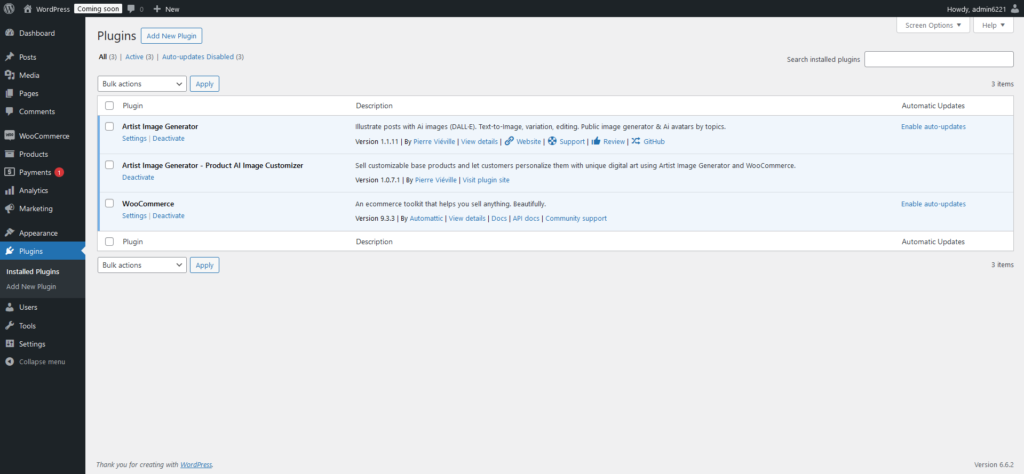
To install a complete WooCommerce solution from scratch, please follow their tutorial here.
In order to work with WC Product Image Customizer, be careful that :
- Your shop needs to be on “live” mode and not in catalog one
- You got “Add to Cart” button showing on the product using WC Product AI Image Customizer
Note that if you don’t have the “Add to Cart” button, maybe your shop is not fully configured or your product quantity is set as 0, so pass it to a postive number.
B. Add a brand new WooCommerce Product
Go to Products > Add new Product then fill up all the classic fields of a product – title, desc, category, etc.
In Product Type, you can chose between a “Simple Product” and “Variable Product” : both types are handled by the plugin so you can build every product you want :
- If you are selling a mug without color change, size change…, you need to select Simple Product
- If you are selling a t-shirt maybe the color or the size change, so get into Variable Product
Then, go to Attributes section and add a new attribute called “aig_shortcode”. Fill the value with an AIG shortcode you’ve built (there are examples inside AIG’s Shortcodes section).
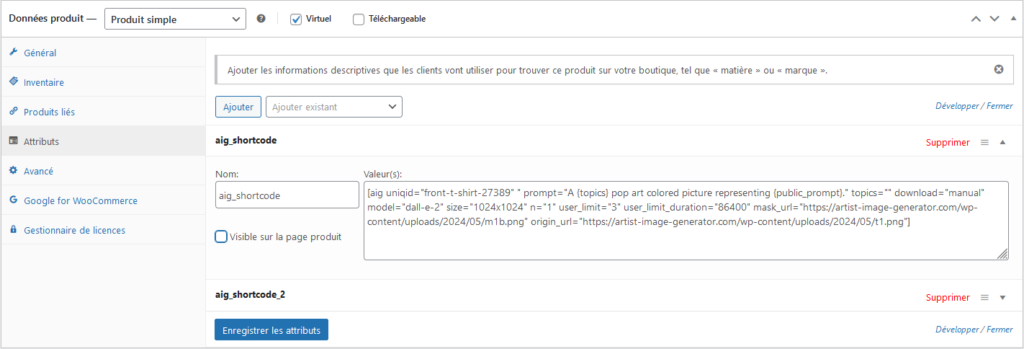
The important parts are :
- uniqid : this is the unique id of your product. Your choice to define it but it allows the generator to be independant from other shortcodes inside your website
- download : must be set as “manual” here
- mask_url : this is used to preview customer created image inside the product in the gallery
- origin_url : this is globally a “blank” image of the product
- size : depending of your product, you may need to adapt a square / vertical / horizontal resolution
The origin_url must be also inside the product image gallery because my plugin will find the image inside the gallery corresponding to origin_url and build the preview based on origin_url + mask_url + customer’s generated image, mix them and render the whole thing inside the gallery as a unique image.
You can chose to have multiple generators inside the same product page. For a T-shirt, it could be the back and the front for exemple. In this case, add a new attribute called “aig_shortcode_2” with the same shortcode or a totally different one – they are independant. Repeat the same process and make sure that origin_url, mask_url and uniqid are uniq through each generators.
Note : you can have more generators, just follow this format “aig_shortcode_{n}”
With Variable Product type, you can have a specific image thumbnail for each variation. So when the user select a product variation (ex: a red t-shirt), he can preview the t-shirt with the right color.
The plugin can handle variable product : inside each variation, you got 2 more fields called “origin_url” and “mask_url” with basically needs to be filled as before. To be easiest make sure that origin_url = the url of the thumbnail you’ve chosen for this variation.
Then, when the customer will select the red t-shirt, he got it’s generated image inside the red t-shirt. When he will select the white t-shirt, he will have the same generated image inside the white t-shirt.
Note that :
- Customer’s generated images are stored in the client-side browser, not inside the WordPress
- When the customer click to chose an image, this one is stored inside the WordPress
When you have finished all this configuration, you need to fill up the Image Gallery and a Product Thumbnail. I’m repeating but make sure that origin_url are present anywhere inside the Product Thumbnail or the Image Gallery.
C. Tips for creating an awesome mask
Depending of your store and your products, this step is a bit time consuming because you need to create for each personnalized product and variation, a mask. But this is a one time operation and you can optimize the process.
You can create simple mask through my plugin inside the “Edit” tab but i will not exposing that as it is less relevant now in terms of quality and precision. They are awesome tools like PhotoShop, Canvas or even Inkscape to do such things, even using AI, and i recommand you to use theses solutions.
The easiest way to build a mask is to start with a blank mockup. You can download mockup throught Internet using Website libraries like Freepik, Unsplash. If you have print-on-demand service like Gelato, you can also pick up blank product image from their website (this is free to use even as commercial use).
You can also find over the web .psd mockups that are ready to go to generate the blank product and the mask. Photoshop mockups are cool because they offer a cut out image and the possibility to upload your own image inside a mask that is already present. So you just have to hide some layers and export as .png.
If you do not have mockups, lets get strated with a basic blank product picked up on Gelato :
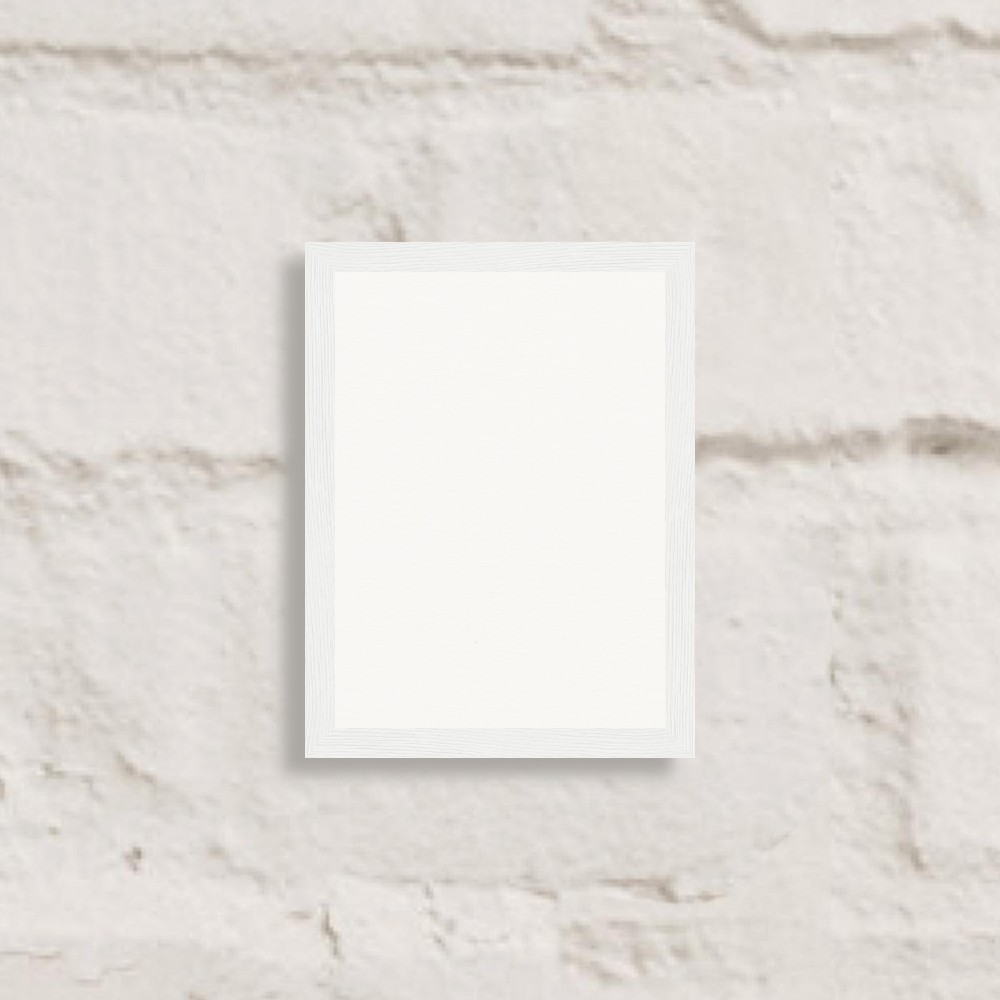
Note that this image will be our origin_url : this is a blank product where the mask will be inserted into.
Using Photoshop or another tool, our goal will be to remove the white part and let is as a transparent one.
First, open your blank image inside Photoshop, and select the area of your choice. You can use multiple tools to define the mask area. On a T-shirt, you can also cut out this part using color selection for example. But i’m really not a Photoshop expert, so let’s keep it simple :
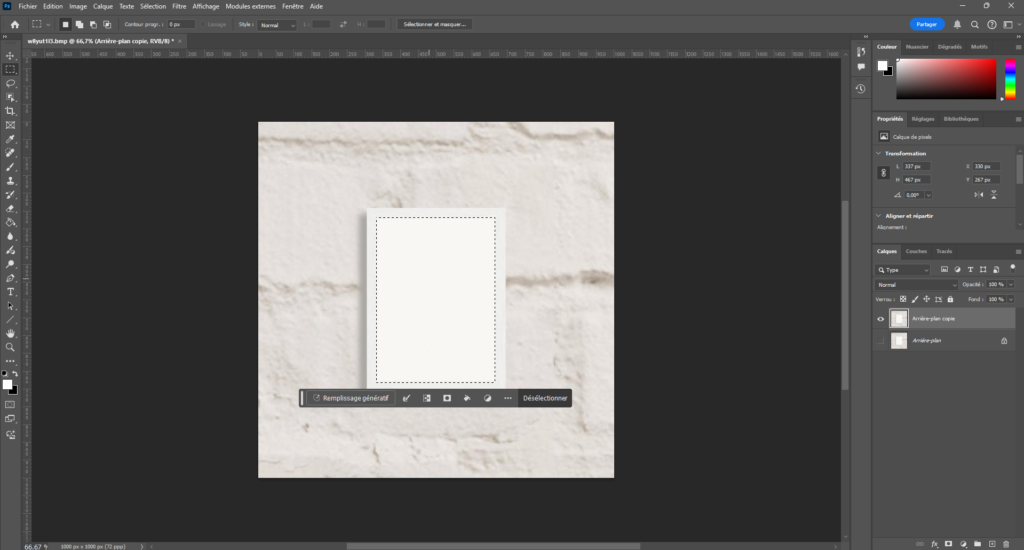
Now, just right click on the selected area and chose “Invert” :

Then right click again and chose “Layer by cut“. On your layers list, you gonna have a new created layer. Just hide the previous one, and export as .png : you’ve created your mask.
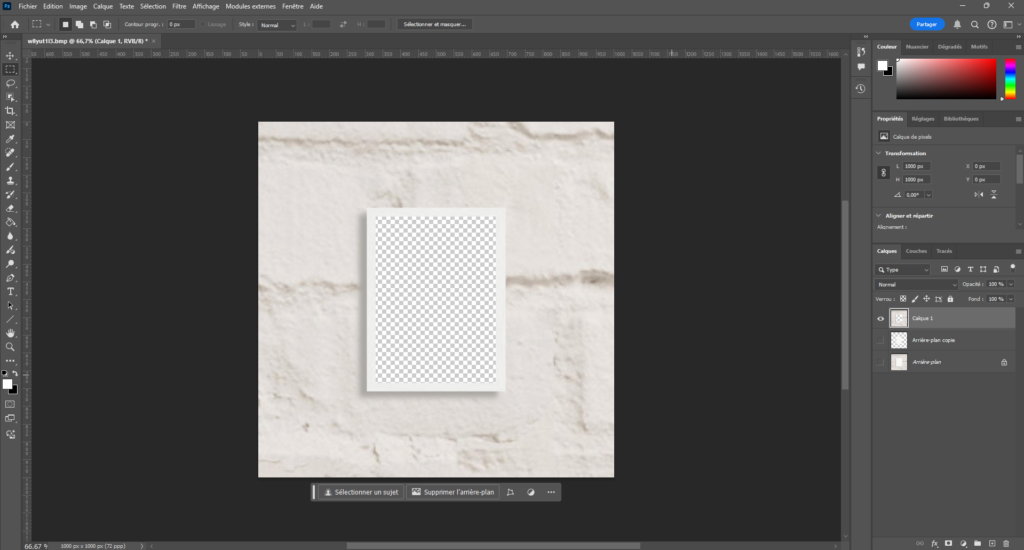
Tips :
- If you had to manage multiple blank images and masks, keep simple names :
- origin-product-1.png / mask-product-1.png (set 1)
- origin-product-2-front.png / mask-product-2-front.png (set 2a)
- origin-product-2-back.png / mask-product-2-back.png (set 2b).
- etc…
- Feel free to re-use the same set inside other products if there is only minor changes, ex :
- Your product is a wooden frame, keep the same set for the metal one
- Your product is a poster, keep the same set for a canvas frame
- It doesn’t matter for the user as it will be just used as preview
- You can have different transparency degrees inside the mask to create realistic effects such as this one : https://artist-image-generator.com/wp-content/uploads/2024/05/m1b.png
Now that you have the blank image and the mask image of your product, just :
- Upload the set inside your wordpress media library
- Add the blank image inside your Product Image Gallery or thumbnail
- Copy the link of the blank image and the mask image
- Paste them inside origin_url and mask_url of the shortcode inside WC Attributes tab
- Save and you got your product configured
Repeat the operation over all your variations and / or all your personnalizable products.
D. Managing the customer’s generation limit of each shortcode
It could be necessary that your customers can’t generate billions of images with no conversion at all. There is 2 way you can handle that depending of your needs.
Define inside the shortcode uniqid, user_limit and user_limit_duration :
| Attribute | Description |
|---|---|
| user_limit | Number of images a user can generate (default is 0, unlimited). |
| user_limit_duration | Duration of the user limit in seconds (default is 0, lifetime). |
Then from a merchant POV, you can calculate the cost of X generated images max and pass on the price the amount it cost to you.
Using Customer credit balance (sell credits to your customers)
A full post is available here to configure your credit product system inside WooCommerce. Note that it will override user_limit and user_limit_duration if it is set.
Using this way, your customers needs to have credits to create image as they want through images generators. From a merchant POV, you can take a margin there for each credit.
Note that each order is only credited after the command is “Finished” and “Paid”, so i recommand to check the status when a customer order it.
E. Playing with other features
Enable “drop your own image” input
By just adding the attribute user_img=true inside the shortcode, your customer will be able to use its own image (.png, .jpg) or generate via the AI generator.
[aig prompt="A {topics} art colored picture representing {public_prompt}." topics="street, pop, new" download="manual" model="dall-e-3" size="1024x1024" n="1" user_limit="1" user_limit_duration="86400" mask_url="{mask-img.png}" origin_url="{origin-img.jpg}" user_img="true"]
The “drop your own image” is just an new input. Each dropped image will not be stored inside WordPress but on client-side browser so it will not overload your website.
It could be handy to have such a feature to diversify your product offer for your customers.
Use Stable Diffusion instead of DALL-E for more realistic imagery
If you need to have more realistic images than DALL-E (which is dedicated to art), you can use my own imagery service. It works throught Stable Diffusion 3. Note that it is only avaiable for image generators (not in the admin).
To use this feature, you need to buy Artist Image Generator Credits here :

Credits Pack
Credits packs allow you to use AIG models like Upscaling, Stable Diffusion 3 and Face Swapping via AI.
When you complete the order, your AIG account will be credited after a manual validation by my side.
On the homepage of your AIG customer account, you will have a JWT Token showing. Copy this code.
Then, go to your website > WP administration > Artist Image Generator > Settings tab and paste your JWT Token inside the “Your Token field”.
Now you just linked your website with my AIG service, and you can see your credits balance inside “Service” tab.
After that, just get inside a shortcode and set the attribute model=”aig-model” instead of model=”dall-e-3″.
If you use WC Product Ai Image Customizer :
[aig prompt="A {topics} art colored picture representing {public_prompt}." topics="street, pop, new" download="manual" model="aig-model" size="1024x1024" n="1" user_limit="1" user_limit_duration="86400" mask_url="{mask-img.png}" origin_url="{origin-img.jpg}"]If you don’t use (so bloggers) :
[aig prompt="A {topics} art colored picture representing {public_prompt}." topics="street, pop, new" download="manual" model="aig-model" size="1024x1024" n="1" user_limit="1" user_limit_duration="86400"]F. Create’N’Face Swap feature (WC Product AI Image Customizer only)
Same as the E. part, just make sure you set also usr_img=”true”. Here you will have an input field where the customer will upload their profile picture and prompt something to create a new image and do a face swap on the newly created.
Note that the Create’N’Face Swap feature doesn’t work in parallel of user uploading.
[aig prompt="A {topics} art colored picture representing {public_prompt}." topics="street, pop, new" download="manual" model="aig-model" usr_img="true" size="1024x1024" n="1" user_limit="1" user_limit_duration="86400" mask_url="{mask-img.png}" origin_url="{origin-img.jpg}"]G. Use your own prebuilt gallery with Google Drive
If you need to have prebuilt designs with the same system, you can tell your customers to :
| Classic way | Faceswap way |
| Use their own image | Use their profile picture to faceswap |
| OR Create an image through AI | AND Create an image through AI for faceswap |
| OR Select prebuilt image | OR/AND Select prebuilt image for faceswap |
